
.webp?language=en-US)

Variation and Upscale Functions in Midjourney: A Beginner’s Guide
by Qing Lana Luo, PLA, ASLA, Afshin Ashari, OALA, Radu Dicher, ASLA, LFA, Phillip Fernberg, ASLA, Benjamin George, ASLA, Tony Kostreski, PLA, ASLA, Matt Perotto, ASLA, and Lauren Schmidt, PLA, ASLA
Our article published this spring includes a step-by-step beginner's tutorial on setting up Midjourney and Discord accounts, and how to use a text prompt to generate images. This guide will walk you through the basic functions of variation and upscale in Midjourney, allowing you to create and modify images with ease.
For ease of understanding, the text prompt used in this article is provided below:
/imagine prompt Colorful community garden with people working hard, tool shed and trellis in the field, realistic photograph style
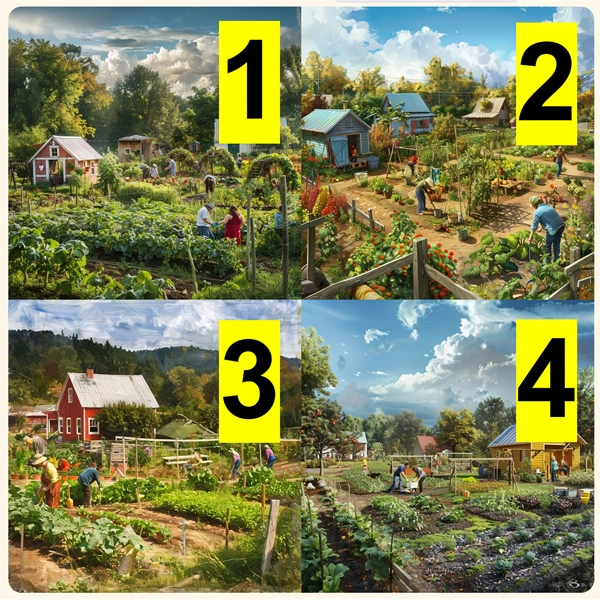
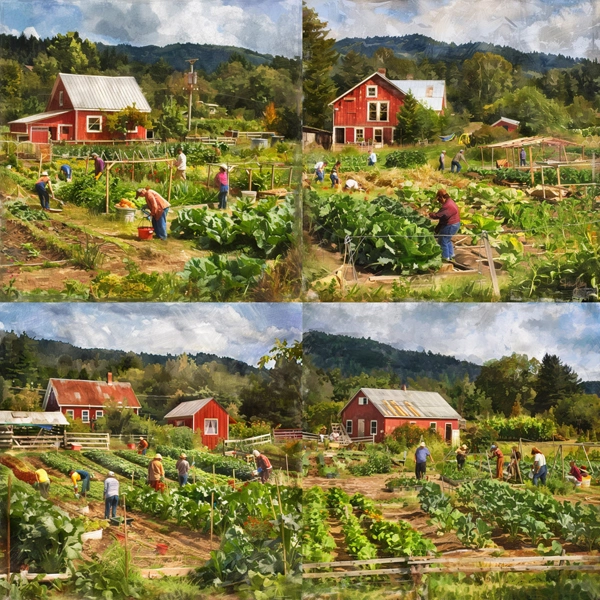
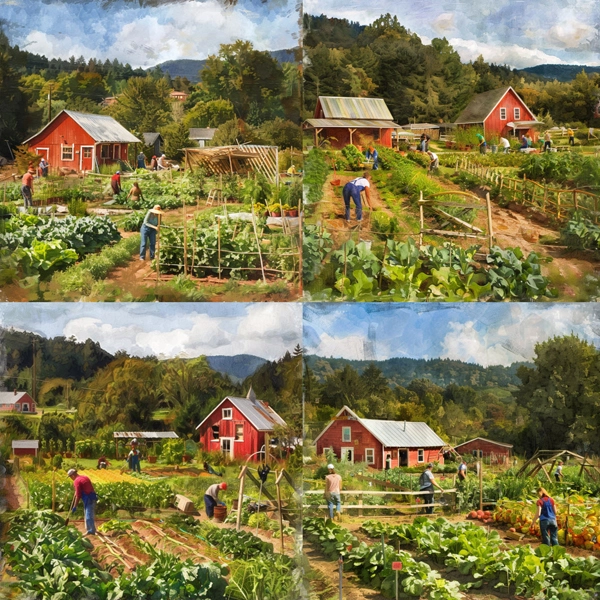
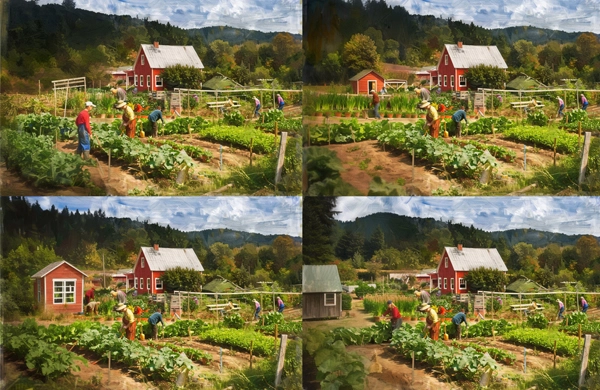
Initial Batch of Four Images Generated in a Grid
After you enter your text prompt, you’ll receive four images displayed in a grid (see Figure 1). The images won't be numbered on your screen, but Midjourney assigns a numerical order to them behind the scenes (as labeled in Figure 1). It is important for users to know the order.
As you see in Figure 1, each image will have a unique color palette and composition. For example:
- Image 1 features three sheds on the left and in the background.
- Image 2 shows three sheds on the left and in the background.
- Image 3 highlights a larger red barn as the focal point.
- Image 4 has a yellow cabin on the right side.
Re-Generate, Variation, and Upscale Buttons
Below the image grid, there are two rows of buttons as shown below (Figure 2). Let’s explain in detail what these buttons are for:
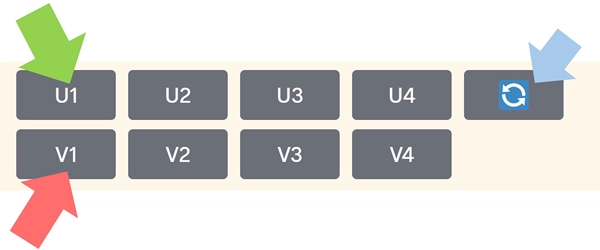
Re-generate Button: If you're not satisfied with any of the four images, you can use the blue re-generate button on the far right (see blue arrow in Figure 2). Clicking it will make Midjourney create a new set of images.
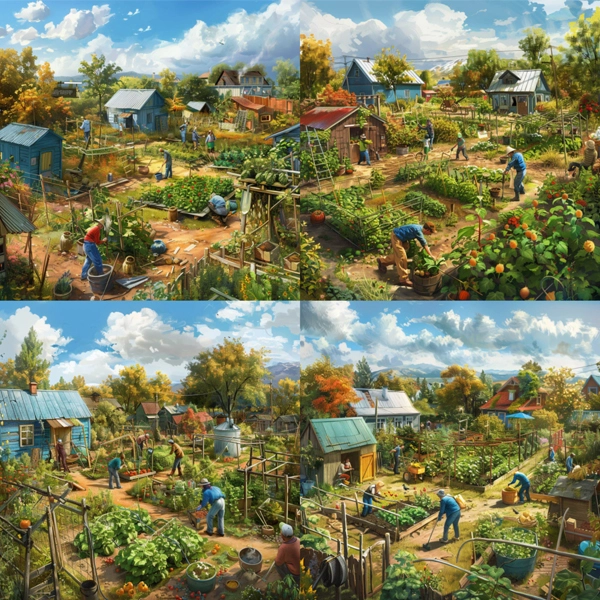
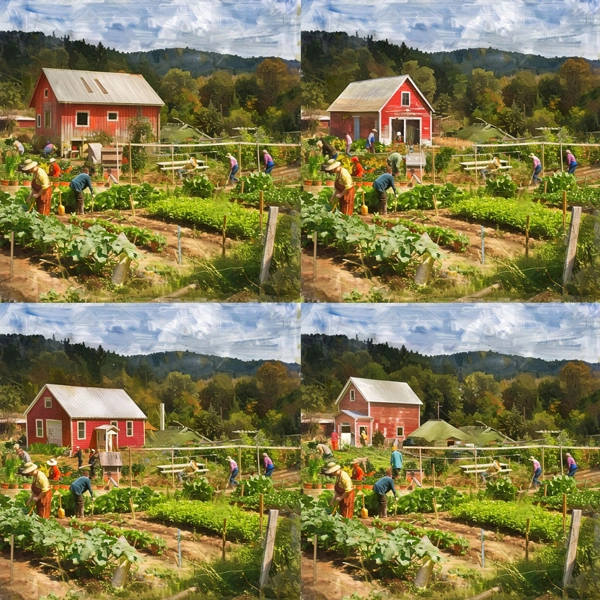
Variation Buttons (V1, V2, V3, and V4—see red arrow in Figure 2): Clicking any of these buttons will generate variations of the selected image while keeping the same style and composition. For example, if you click the V2 button, four variations of the original #2 image will be created. These new images will maintain the original’s style, including the blue sheds, color palettes, blue sky, and clouds (see Figure 3).
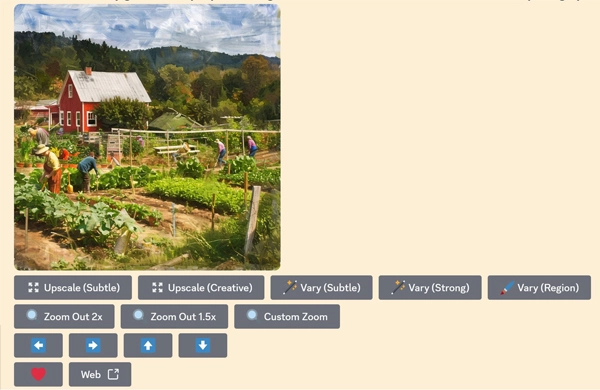
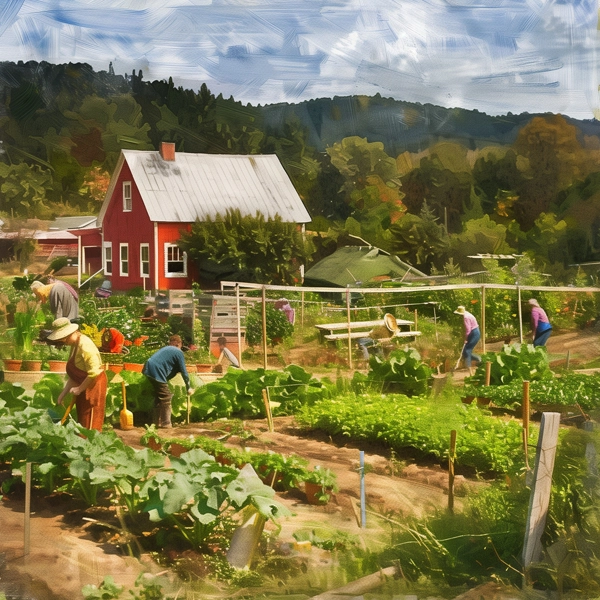
Upscale Buttons (U1, U2, U3, and U4—see green arrow in Figure 2): These buttons allow you to enlarge a selected image. For example, if you click the U3 button, Midjourney will create an enlarged version of the original Image #3 (see Figure 4).
Tweak an Image
When you like an image and have upscaled it, you can decide whether to save it or continue tweaking it.
If you're completely satisfied with the upscaled image, you can save it:
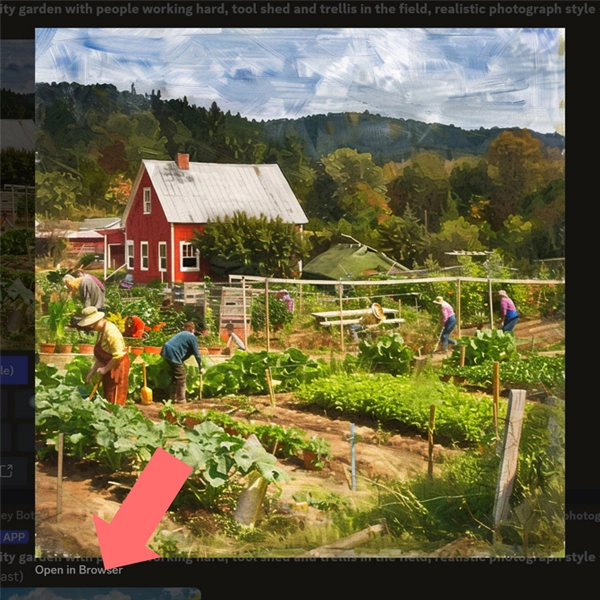
- Click on the image to let it zoom in.
- At the bottom of your screen, you'll see a text link that says “Open in Browser” (as shown in Figure 5 below—see red arrow).
- Click on this link to open the image in a new browser tab in higher resolution.
- Right-click the image and select “Save image as” to save it as a .png file on your local drive.
However, if you are not entirely happy with the upscaled image, you can make further tweaks using the function buttons below the image (see Figure 4) to make additional modifications.
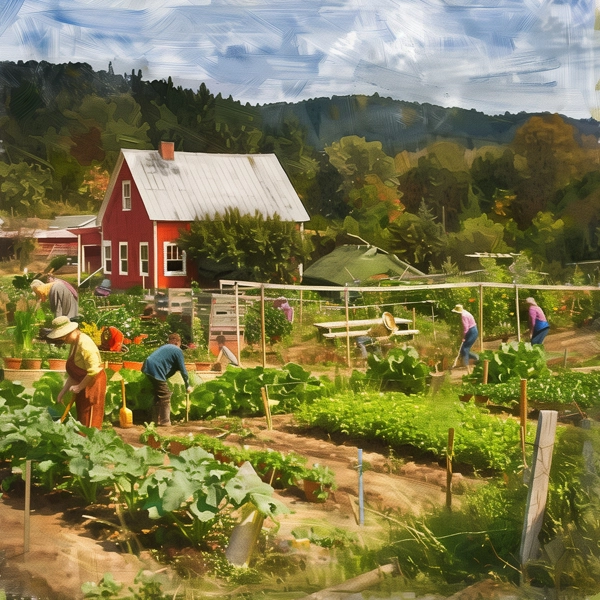
Upscale (Subtle): This option allows Midjourney to create another upscaled image with very subtle changes. In my instance, I have got an image that is almost identical to the previous version (see Figure 6).
Upscale (Creative): This option allows Midjourney to make gentle, creative changes to the image, modifying a few elements slightly (see Figure 7 where only a few people changed).
Vary (Subtle): This option allows you to generate a grid of four new images with subtle changes. See below.
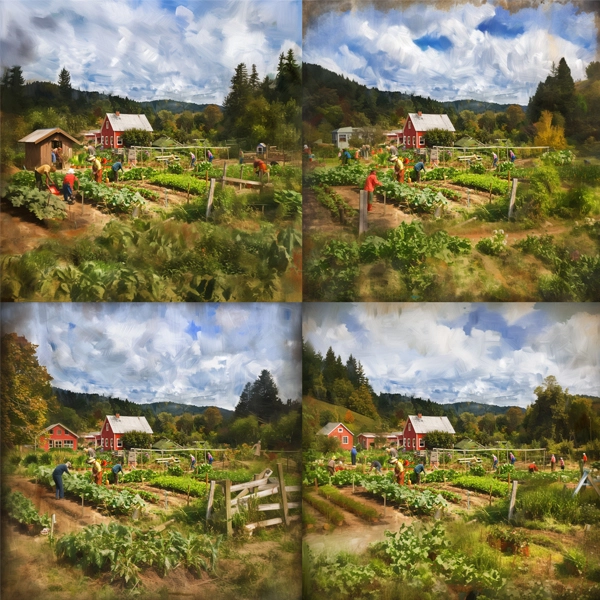
Vary (Strong): This option will generate a grid of four new images with much more significant modifications. In Figure 9, you can see that the barn's design, location, and quantity have changed more dramatically than previous example.
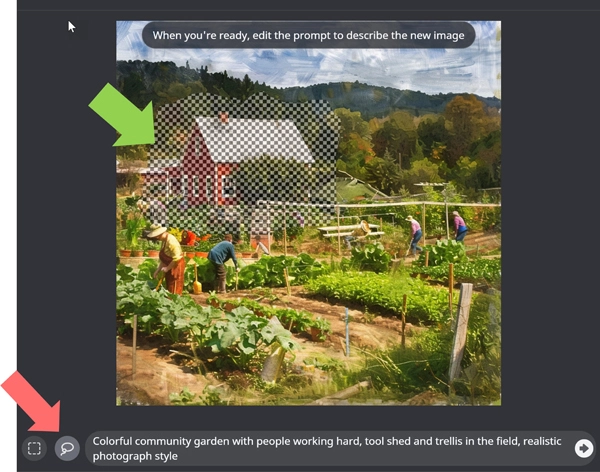
Vary (Region): This option allows you to make changes to a specific area. For example, if you want to modify only the red barn area. You can use the “Lasso tool” (See Figure 10, red arrow) to draw around the red barn (green arrow). The selected area will be covered with a checkerboard pattern.
You can also adjust your text prompt in the box at the bottom of the screen.
As a result, I got a grid of four images that only has the red barn modified while the rest of the image retained unchanged (see Figure 11).
Zoom Out 2x (and Zoom Out 1.5x): These options will generate images that are zoomed out. For instance, I used “Zoom Out 2x” here and got the images below (Figure 12):
White/blue arrow buttons: In Figure 4, there are also white/blue arrows. Clicking on one of them will pan the image in the selected direction. For example, if you click the "Left" button, you'll get a grid of images panned to the left, showing more elements on the left while placing the red barn in the middle of each image.
Here you probably have noticed that the image aspect ratio has changed from 3:2 to 1:1. To focus on this article’s topics, let’s hold that question and we will get it covered in future articles.
Additional Topics
Image archive: You may be wondering if there is a centralized place where you can find all of your generated images. If you go to alpha.midjourney.com/archive, and you will find your images archived there!
Recently, Midjourney launched its own Alpha site where you can create images directly. However, you still need a Discord account. We believe using Midjourney through Discord is more cohesive and helps build a solid foundation at this point, but we will cover the Midjourney Alpha site in future articles when it is more developed.
There will be more articles in this series in the near future, where we will discuss prompt techniques and parameters in detail.
For more on this topic, see the A Guide to Setting Up Midjourney on Discord: A Tutorial for Beginners and SKILL | ED: Exploring AI's Impact on Landscape Architecture.
Article contributors:
- Qing Lana Luo, PLA, MLA, ASLA, Associate Professor of Landscape Architecture, Oklahoma State University
- Afshin Ashari, MLA, OALA, Assistant Professor, University of Guelph
- Radu Dicher, ASLA, LFA, BIM Manager, SWA
- Phillip Fernberg, ASLA, Director of Digital Innovation, OJB
- Benjamin George, ASLA, Associate Professor, Utah State University
- Tony Kostreski, PLA, ASLA, Senior Landscape Product Specialist, Vectorworks
- Matt Perotto, ASLA, Senior Associate, Janet Rosenberg & Studio
- Lauren Schmidt, PLA, ASLA, Parallax Team
Qing Lana Luo, PLA, MLA, ASLA, the main author of this article, is an associate professor at Oklahoma State University with seventeen years of prior design experience in Boston, MA, and Beijing, China. She has held design leadership roles at renowned firms such as EDSA, Carol R. Johnson Associates (now Arcadis | IBI-Placemaking), and Turenscape, working on diverse projects worldwide, from urban parks to mixed-use developments. Her work has earned numerous international and national design awards. Currently, Qing Luo teaches core design classes at OSU as a tenured landscape architecture professor, focusing on sustainable design, technology, and professional practice. She showcases her expertise in land design, materials, technology, and sustainability.